Hive

Hive is a framework that aims to help with organizing personal Nix configurations. This post explains why I have decided to switch to it and provides a step-by-step tutorial for trying it out yourself. It is intended for Nix users who are curious and feel that their current configuration is disorganized, and are looking for a new way to restructure their code.
In this post, I will describe my own approach to using Hive. It may differ from the prevailing convention of naming things, and it may not utilize the latest available Nix tools. I approach my problem as a developer who aims to create a convenient and reproducible development environment. I am not an operations professional who needs to ensure absolute security. Additionally, I am limited by my current understanding, and I am open to your comments and opinions.
§ Factoids
- Hive is the spiritual successor of Digga.
- Hive originates from std (Standard).
- The author is David Arnold.
- The first commit in the repository is dated 29th March 2022.
§ Road to Hive
I began with Will T's NixOS series in 2022, where I copied configurations without fully comprehending them. However, I was able to sustain this practice for some time and eventually transitioned my daily office tasks from Ubuntu WSL to NixOS WSL.
After creating the Neovim flake, I gained some confidence. I felt like I understood much more and was ready for the next step. I wanted to redo my main NixOS configuration.
In my initial configuration, things became quite messy. I mixed flakes, dwelled
on the old-school import, tampered with callPackage without comprehending
its purpose, and I completely overlooked the "nix modules boat", despite using
them as copy-pasta occasionally.
I didn't have a solid grasp of the language and the module system, and I needed some guidance on how to organize my configurations. So I began researching and came across the NixOS Guide, which included a link to Digga. However, I discovered that the project had already been deprecated.

Digga was already removed from the NixOS Guide, but Hive had not yet been added.
The author mentions migration to std, flake-parts or flake-utils-plus. While investigating std, the Hive was mentioned in the docs:
The author mentions migration to std, flake-parts, or flake-utils-plus. While investigating std, the Hive was mentioned in the documentation:
"Once you got fed up with divnix/digga or a disorganized personal configuration, please head straight over to divnix/hive and join the chat, there. It's work in progress. But hey! It means: we can progress together!"
And there it was, Hive, a mysterious project with a ban on README, a small community, and some praise in the matrix chat. I was intrigued.
However, before fully committing, I searched for alternatives.

This message is from Discord, and it is not me who is asking, but rather someone who is facing the same dilemma.
I have explored the documentation of flake-parts, but it was too difficult for me to fully understand the concept. It felt like I was starting from scratch with both Hive and flake-parts. One thing I noticed was that the repositories using Hive had certain block types, which gave me the impression that it is a more opinionated framework. As a beginner, this is something I was searching for.
I followed Lord-Valen's repository. I initially created a rough foundation draft by rewriting Valen's flake and migrating my old configurations without checking if they build. Once I had my desired structure set up, I created a fresh WSL instance and continued fixing the code until I successfully completed the first full build and system switch. From that point on, I had a good-enough understanding of it, and the remaining final details were easily resolved.
§ NixOS Module
Before I begin describing Hive, I must mention that the NixOS module is an essential mechanism.
The usual structure is as follows:
{ config, pkgs, lib, ... }:
with lib;
let
  cfg = config.thisModule;
in {
  imports = [
    ./someOtherModule1.nix
    ./someOtherModule2.nix
  ];
  options.thisModule = {
    someOption = mkOption {
      type = types.bool;
      default = false;
    };
  };
  config = {
    someConfig = mkIf cfg.someOption "someValue";
    someOtherConfig = "someOtherValue";
  };
}
There are three important sections:
imports- a list of other NixOS modules that will be imported.options- a list of options for the current module.config- the main "body" containing default and option-based configuration.
Usually, the documentation mentions the enable option, which is common in
NixOS and Home Manager configurations. In my case, I write and import modules
that I intend to use, so I never use enable. However, I can now understand the
concept of repositories with prepared and maintained modules. This is also why I
received feedback on my Neovim flake tutorial, suggesting that the preferred
approach should be contributing to
NixVim.
If modules do not have options or imports, then we can omit the config field and place the "main body" at the top level.
{ pkgs, ... }: {
  imports = [ ./someOtherModule.nix ];
  environment.systemPackages =  [ pkgs.hello ];
}
§ Paisano and Haumea
It is appropriate to mention the transitive dependencies Paisano and Haumea. Both tools appear to have been created to solve a similar problem - enabling the use of file systems to declare modules and providing a nix function to automatically load or collect these modules into a nix attribute set. Additionally, the load functions provide standardized call parameters, making it easy to access other modules from the configuration. While there are more advanced techniques such as picking, filtering, or hoisting different attributes, it is not necessary to delve into further details about them right now.
Haumea exists with its initial commit from the 1st April 2023, and it is authored by figsoda. You can also take a look on my brief cheatsheet on Haumea.
Paisano was initially a part of the Standard platform, but it was extracted as separate tool with a first commit in its own repository on 9th February 2023. There is also a short cheatsheet available.
§ The Hive
Hive uses the following hierarchy of building blocks:
flowchart TB
  subgraph Hive
    subgraph Cell
      subgraph Cell Block
        subgraph Cell Block Instance
        end
      end
    end
  end
The blocks will be introduced gradually throughout the tutorial.
Before we start, please also take a look at the diagram below that explains the Hive. Don't worry if it seems complex at first glance. Just give it a quick scan for now and proceed with the tutorial. Once you finish the tutorial, you can come back to review the diagram and see if it becomes easier to understand.
flowchart TB
  growOn -->|produces| flakeOutput
  growOn -->|processing| soil
  growOn -->|uses| hiveConfig
  hiveConfig -->|declares source directory of| cellBlock
  hiveConfig -->|declares list of| cellBlockType
  soil -->|contains| transformedBlock
  transformedBlock -->|is produced by| collect

  collect -->|resolves| collector
  collect -->|processing| cellBlock
  collector -->|calls| walkPaisano
  walkPaisano -->|applies| renamer
  walkPaisano -->|applies| transformer

  cellBlock -->|calls| findLoad
  findLoad -->|finds all| cellBlockInstance
  findLoad -->|calls| hamuea-load
  hamuea-load -->|loads| cellBlockInstance

  cellBlock -->|is of| cellBlockType
  cellBlockType ---->|has dedicated| collector
  cellBlockType -->|has dedicated| transformer

  transformer -->|uses| bee
§ Tutorial
I invite you to try out Hive on your own with the following tutorial. It's very simple, just enough to explain the key concept I have learned. Afterwards, there are a few more chapters discussing the whole system organization.
You can also find the tutorial sources at github:PrimaMateria/blog-hive.
§ Testing Environment
To test this tutorial, we will utilize Nix's built-in functionality to execute system configuration in the virtual machine. Initially, define the initial flake without Hive.
{
outputs = { ... }@inputs:
{
nixosConfigurations.experiment = inputs.nixpkgs.lib.nixosSystem {
system = "x86_64-linux";
modules = [
({ pkgs, ... }: {
users.users.foo = {
isNormalUser = true;
initialPassword = "foo";
};
environment.systemPackages = with pkgs; [ hello ];
system.stateVersion = "23.11";
})
];
};
};
inputs = {
nixpkgs-stable.url = "github:nixos/nixpkgs/23.11";
nixpkgs-unstable.url = "github:nixos/nixpkgs/master";
nixpkgs.follows = "nixpkgs-unstable";
};
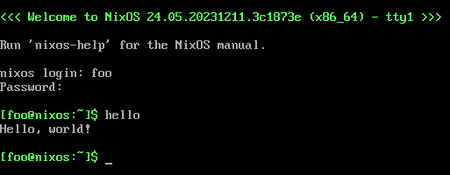
}Now, test it with the following command.
nix run '.#nixosConfigurations.experiment.config.system.build.vm'The Qemu window will start with a machine that loads the configuration. Log in
using "foo/foo" and try to run the command hello.
§ Hive Flake
Hive is a configuration based on flakes. Inputs include:
- std - the Standard - as I understand it, it is a more complex framework intended for DevOps to declare configurations for building and deploying projects. The Hive was created based on the Standard with the intention of focusing on system and home configurations. Personally, I have never used the Standard before and probably will never need to.
- hive - I wouldn't say that Hive is an extension of the Standard. It follows the same principles and reuses some block types from std, but other than that, it seems that there isn't much dependency on it.
{
  outputs = { std, hive, ... }@inputs:
    hive.growOn
      {
        inherit inputs;
        # TODO: define cells source directory
        # TODO: define cell blocks
      }
      {
        # TODO: define flake output
      };

  inputs = {
    nixpkgs-stable.url = "github:nixos/nixpkgs/23.11";
    nixpkgs-unstable.url = "github:nixos/nixpkgs/master";
    nixpkgs.follows = "nixpkgs-unstable";

    std = {
      url = "github:divnix/std";
      inputs.nixpkgs.follows = "nixpkgs";
    };

    hive = {
      url = "github:divnix/hive";
      inputs.nixpkgs.follows = "nixpkgs";
    };
  };
}
The outputs are the result of the hive.growOn function. growOn is a Paisano
function that takes a variable count of parameters. The first one is always a
Hive config, where the cells' source directory and cell block types list are
specified.
I believe the remaining parameters are referred to as "layers of soil". These layers are recursively combined into one attribute set, which then becomes the conventional outputs of the flake.
§ Cell
Cells are supposed to be the top-level structure for organizing the configuration. Cells are constructed from different types of cell blocks. What I have usually observed in repositories using Hive is one main cell, sometimes accompanied by smaller cells for, probably, some more exotic use cases. In my own configuration, I decided for the cell to contain everything, and I named it with my nickname "PrimaMateria".
Create a new directory path called cells/experiment and leave it empty for the
time being.
├── cells
│  └── experiment
└── flake.nix
Update the Hive configuration with the cellsFrom attribute.
{
  outputs = { std, hive, ... }@inputs:
    hive.growOn
      {
        inherit inputs;
        cellsFrom = ./cells;
        # TODO: define cell blocks
      }
      {
        # TODO: define flake output
      };

  inputs = {
    nixpkgs-stable.url = "github:nixos/nixpkgs/23.11";
    nixpkgs-unstable.url = "github:nixos/nixpkgs/master";
    nixpkgs.follows = "nixpkgs-unstable";

    std = {
      url = "github:divnix/std";
      inputs.nixpkgs.follows = "nixpkgs";
    };

    hive = {
      url = "github:divnix/hive";
      inputs.nixpkgs.follows = "nixpkgs";
    };
  };
}
David, the author of Standard and Hive, suggests naming the directory nix
instead of cells. This recommendation is based on the idea that it would
provide a clearer indication of the directory's content to individuals who are
not familiar with Hive. However, I have chosen to adopt the new domain language
and name the directory cells.
§ Cell Block
Cell blocks are the fundamental components of a cell. They exist in different forms, and each form dictates the changes that take place when they are collected. Furthermore, each form may have different actions associated with it. Although I personally do not utilize them, based on the documentation, it appears that Standard provides a command-line interface (CLI) tool that offers a user-friendly way to execute these actions.
At first, declare that the hive configuration will use a cell of type
nixosConfiguration.
{
  outputs = { std, hive, ... }@inputs:
    hive.growOn
      {
        inherit inputs;
        cellsFrom = ./cells;
        cellBlocks = with hive.blockTypes; [
          nixosConfigurations
        ];
      }
      {
        # TODO: define flake output
      };

  inputs = {
    nixpkgs-stable.url = "github:nixos/nixpkgs/23.11";
    nixpkgs-unstable.url = "github:nixos/nixpkgs/master";
    nixpkgs.follows = "nixpkgs-unstable";

    std = {
      url = "github:divnix/std";
      inputs.nixpkgs.follows = "nixpkgs";
    };

    hive = {
      url = "github:divnix/hive";
      inputs.nixpkgs.follows = "nixpkgs";
    };
  };
}
Now, create the new cell block. The filename must match the name of the cell block type.
├── cells
│  └── experiment
│     └── nixosConfigurations.nix
└── flake.nix
Move the "experiment" system to the cell block and assign the main module, which
is currently the only module, to the attribute that bears the name of the system
configuration - experiment.
{ inputs, cell }:
let
  inherit (inputs) nixpkgs;
in
{
  experiment = {
    users.users.foo = {
      isNormalUser = true;
      initialPassword = "foo";
    };

    environment.systemPackages = with nixpkgs; [ hello ];
    system.stateVersion = "23.11";
  };
}
The top-level configuration with the system attribute is not included in the
cell block. Cell blocks are independent of any specific system. The target
system will be configured later in the "bee" module.
Observe how the cell block can access all the inputs of the root flake
(specified by the inputs parameter), as well as all other cell blocks from the
current cell (specified by the cell parameter, which will be used later).
§ Bee Module
The Bee module is a configuration used by the transformer to transform the cell blocks into system-specific derivatives. It includes a list of target systems and slots for passing Home Manager, WSL, Darwin, and Nix package flakes, which will be used to produce the transformed blocks.
Once again, declare a new cell block of the type functions as the first step.
This type is the most versatile and does not undergo any special transformations
during the harvest process.
{
  outputs = { std, hive, ... }@inputs:
    hive.growOn
      {
        inherit inputs;
        cellsFrom = ./cells;
        cellBlocks = with std.blockTypes; with hive.blockTypes; [
          (functions "bee")
          nixosConfigurations
        ];
      }
      {
        # TODO: define flake output
      };

  inputs = {
    nixpkgs-stable.url = "github:nixos/nixpkgs/23.11";
    nixpkgs-unstable.url = "github:nixos/nixpkgs/master";
    nixpkgs.follows = "nixpkgs-unstable";

    std = {
      url = "github:divnix/std";
      inputs.nixpkgs.follows = "nixpkgs";
    };

    hive = {
      url = "github:divnix/hive";
      inputs.nixpkgs.follows = "nixpkgs";
    };
  };
}
Create the bee module. If your configuration becomes more complex, you may eventually have multiple bees.
├── cells
│  └── experiment
│     ├── nixosConfigurations.nix
│     └── bee.nix
└── flake.nix
# ████ ████
# ██ ██ ██
# ██ ██ ██
# ██████████
# ████░░██░░░░██
# ██░░██░░██░░░░░░▓▓
# ▓▓▓▓██░░██░░██░░▓▓░░██
# ██░░██░░██░░░░░░██
# ████░░██░░░░██
# ██████████
{ inputs, cell }: {
system = "x86_64-linux";
pkgs = inputs.nixpkgs;
}If you attempt to define an overlay within the cell block, Hive will warn you
that this will not work and that overlays need to be already defined in pkgs
provided by the bee. I don't have an example for it because, so far, I have
always been able to meet my requirements without an overlay.
Update: an example how to set up overlays. I didn't try this yet.
Finally, assign the bee to the main module of the experiment's NixOS
configuration. Now, the cell parameter becomes useful for easily referencing
the bee cell block.
{ inputs, cell }:
let
  inherit (inputs) nixpkgs;
  inherit (cell) bee;
in
{
  experiment = {
    inherit bee;

    users.users.foo = {
      isNormalUser = true;
      initialPassword = "foo";
    };

    environment.systemPackages = with nixpkgs; [ hello ];
    system.stateVersion = "23.11";
  };
}
§ Collect
The collect function produces transformed blocks from the provided cell block.
Depending on the type of cell block, it selects the corresponding collector and
executes it to collect and transform cell block instances using the Bee module.
The transformed blocks are then placed in the soil, which will be processed by
the growOn function to produce the final flake output.
Collect nixosConfigurations cell block.
{
  outputs = { self, std, hive, ... }@inputs:
    hive.growOn
      {
        inherit inputs;
        cellsFrom = ./cells;
        cellBlocks = with hive.blockTypes; with std.blockTypes; [
          (functions "bee")
          nixosConfigurations
        ];
      }
      {
        nixosConfigurations = hive.collect self "nixosConfigurations";
      };

  inputs = {
    nixpkgs-stable.url = "github:nixos/nixpkgs/23.11";
    nixpkgs-unstable.url = "github:nixos/nixpkgs/master";
    nixpkgs.follows = "nixpkgs-unstable";

    std = {
      url = "github:divnix/std";
      inputs.nixpkgs.follows = "nixpkgs";
    };

    hive = {
      url = "github:divnix/hive";
      inputs.nixpkgs.follows = "nixpkgs";
    };
  };
}
If we look at the output of nix flake show, it will show us the following:
├───nixosConfigurations
│   └───experiment-experiment: NixOS configuration
The name "experiment-experiment" is chosen because the cell is called experiment and the nixos configuration is also called experiment. This can be a bit confusing, so let's change it in the next step. But before that, let's test it in the virtual machine.
nix run '.#nixosConfigurations.experiment-experiment.config.system.build.vm'§ findLoad
The function findLoad collects all instances of the cell block with the
specified path in the "block" attribute. These instances are then loaded using
Haumea. The process of loading will be explained in the next step.
Create two instances in the cell block for nixos configurations - a home instance that will build the NixOS system used at home, and a work instance that will build the NixOS system used at work.
├── cells
│  └── experiment
│     ├── nixosConfigurations
│     │  ├── default.nix
│     │  ├── home.nix
│     │  └── work.nix
│     └── bee.nix
└── flake.nix
To simplify the tutorial, let's assume that we need to use the package "hello"
at work. Implement work.nix in the following manner:
{ inputs, cell }:
let
  inherit (inputs) nixpkgs;
  inherit (cell) bee;
in
{
  inherit bee;

  users.users.foo = {
    isNormalUser = true;
    initialPassword = "foo";
  };

  environment.systemPackages = with nixpkgs; [ hello ];
  system.stateVersion = "23.11";
}
And at home, we need to use the package "cowsay". Implement home.nix as shown
below:
{ inputs, cell }:
let
  inherit (inputs) nixpkgs;
  inherit (cell) bee;
in
{
  inherit bee;

  users.users.foo = {
    isNormalUser = true;
    initialPassword = "foo";
  };

  environment.systemPackages = with nixpkgs; [ cowsay ];
  system.stateVersion = "23.11";
}
Finally, in the default.nix, call findLoad to locate and load the NixOS
configurations for both home and work.
{ inputs, cell }:
inputs.hive.findLoad {
  inherit inputs cell;
  block = ./.;
}
Now we can test both NixOS systems in the virtual machine. Test if we can call "hello" on the work system and "cowsay" on the home system.
nix run '.#nixosConfigurations.experiment-work.config.system.build.vm'
nix run '.#nixosConfigurations.experiment-home.config.system.build.vm'
§ Haumea Load
Instances that are loaded by findLoad are loaded using Haumea. This implies
that the instance can be divided into separate files, which will then be
combined into a single set where the attributes align with the file names.
Perhaps I have not fully realized the potential of Haumea yet, but up until now,
I have only found it useful for defining NixOS module options separately. In
other situations, I extract the code into "private" submodules with names that
have the prefix "__". Haumea disregards these submodules, and I load them
either through Nix's import or with nixpkgs.callPackage.
In this step we introduce "system" cell block, that will act as collection of different system configurations for the nixos configurations.
├── cells
│  └── experiment
│     ├── bee.nix
│     ├── nixosConfigurations
│     │  ├── default.nix
│     │  ├── home.nix
│     │  └── work.nix
│     └── system
│        ├── common.nix
│        ├── default.nix
│        └── parrot
│           ├── __cowsay.nix
│           ├── __hello.nix
│           ├── default.nix
│           └── options.nix
└── flake.nix
First, inform Hive about the new cell block that we will be using. Update the
cellblocks in the flake.nix file with the system cell block of type
functions.
{
  outputs = { self, std, hive, ... }@inputs:
    hive.growOn
      {
        inherit inputs;
        cellsFrom = ./cells;
        cellBlocks = with hive.blockTypes; with std.blockTypes; [
          (functions "bee")
          (functions "system")
          nixosConfigurations
        ];
      }
      {
        nixosConfigurations = hive.collect self "nixosConfigurations";
      };

  inputs = {
    nixpkgs-stable.url = "github:nixos/nixpkgs/23.11";
    nixpkgs-unstable.url = "github:nixos/nixpkgs/master";
    nixpkgs.follows = "nixpkgs-unstable";

    std = {
      url = "github:divnix/std";
      inputs.nixpkgs.follows = "nixpkgs";
    };

    hive = {
      url = "github:divnix/hive";
      inputs.nixpkgs.follows = "nixpkgs";
    };
  };
}
Instances of the system cell block will be loaded using the findLoad function
as previously done. Please create the file system/default.nix in the following
manner:
{ inputs, cell }:
inputs.hive.findLoad {
  inherit inputs cell;
  block = ./.;
}
Prior to the home and work NixOS configurations, there was duplicated code that
created the VM user and set the state version. This code should be extracted to
system/common.nix.
{
  users.users.foo = {
    isNormalUser = true;
    initialPassword = "foo";
  };
  system.stateVersion = "23.11";
}
Next, we will create a new cell block instance, which is a "parrot" system module.

Parrot is a strange name. Heh, sorry, just go with it.
The Parrot module configures the cowsay and hello packages based on the set
options values. Create the file system/parrot/default.nix.
{ inputs, config }:
let
  inherit (inputs) nixpkgs;
  cfg = config.experiment.system.parrot;
in
{
  config = {
    environment.systemPackages = [
      (nixpkgs.callPackage ./__hello.nix { inherit (cfg) greeting; })
      (nixpkgs.callPackage ./__cowsay.nix { inherit (cfg) art; })
    ];
  };
}
The option definitions will be extracted to a separate Hamuea module,
system/parrot/options.nix.
{ inputs, cell }:
let
  inherit (inputs.nixpkgs) lib;
in
{
  experiment.system.parrot = {
    greeting = lib.mkOption {
      type = lib.types.str;
      description = "hello message";
      default = "Hello world";
    };
    art = lib.mkOption {
      type = lib.types.str;
      description = "cowsay art - one of items listed by cowsay -l";
      default = "default";
    };
  };
}
The custom cowsay and hello packages are implemented in private Haumea modules.
{ pkgs, art ? "default" }:
pkgs.writeShellApplication {
  name = "cowsay";
  text = ''${pkgs.cowsay}/bin/cowsay -f "${art}" "$@"'';
}
{ pkgs, greeting ? "Hello world" }:
pkgs.writeShellApplication {
name = "hello";
text = ''${pkgs.hello}/bin/hello --greeting "${greeting}"'';
}If they were not private, Haumea would attempt to load them into the NixOS module set, resulting in the following:
{ config = {}; option = {}; cowsay = {}; hello = {}; }The build would fail with a message stating that the NixOS module contains
unsupported attributes because the top level can only contain options,
imports, and config.
Update the work and home NixOS configurations using the new system modules. Configure each system to provide custom values for the parrot options.
{ inputs, cell }:
let
  inherit (inputs) nixpkgs;
  inherit (cell) bee system;
in
{
  inherit bee;

  imports = [
    system.common
    system.parrot
    {
      experiment.system.parrot = {
        art = "elephant";
        greeting = "Hello home!";
      };
    }
  ];
}
{ inputs, cell }:
let
inherit (inputs) nixpkgs;
inherit (cell) bee system;
in
{
inherit bee;
imports = [
system.common
system.parrot
{
experiment.system.parrot = {
art = "small";
greeting = "Hello work!";
};
}
];
}Finally, retest the outcome in the virtual machine.
nix run '.#nixosConfigurations.experiment-work.config.system.build.vm'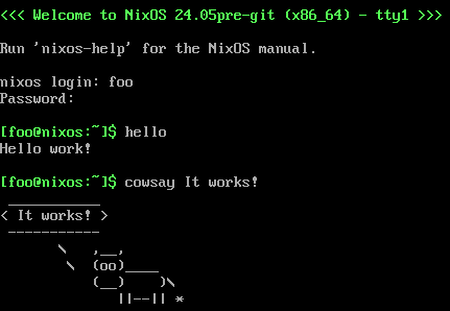
nix run '.#nixosConfigurations.experiment-home.config.system.build.vm'
This tutorial concludes here. In the upcoming chapters, we will discuss cell organization.
§ Standard Cell Structure
Now that we already know how to create cell blocks and how to connect them, a question arises regarding the organization of the hive. What does one cell encompass and what types of cell blocks does it consist of?
First, I will present Lord-Valen's configuration.nix which, I believe, originates from the recommended structures used in Standard. Next, I will present my own domain language that I hope is a tiny bit more self-explanatory.
Valen's comb contains three cells.
- lord-valen
- repo
- sioux
The cell labeled "lord-valen" is the largest, and I dedicated my attention to studying it further. I proceeded to open each cell block and documented which other cell block it utilizes. The outcome was presented in the form of the following diagram:
flowchart BT

    subgraph cell
        homeModules --> homeProfiles
        homeProfiles --> homeSuites
        homeProfiles --> nixosConfigurations
        homeSuites --> nixosConfigurations

        nixosModules --> nixosProfiles
        nixosProfiles --> nixosSuites
        nixosProfiles  --> nixosConfigurations
        nixosSuites --> nixosConfigurations
        userProfiles --> nixosSuites

        diskoConfigurations --> hardwareProfiles
        hardwareProfiles ---> nixosConfigurations
        arionProfiles ---> nixosConfigurations

        nixosConfigurations --> colmenaConfigurations
        nixosConfigurations --> installers
    end

    subgraph inputs
       nixos-hardware
       nixos-generators
    end

    nixos-hardware -..-> hardwareProfiles
    nixos-generators -..-> installers
If we examine the vertical lines, we can identify a simplified backbone.
flowchart BT

    modules --> profiles
    profiles --> suites
    suites --> nixosConfigurations
If we examine the horizontal planes, we can observe such simplified landscape.
block-beta
columns 3

    nixosConfigurations:3
    home
    nixos
    hardware
Interestingly, Valen does not use separate homeConfigurations, but instead
includes the home manager config into nixosConfigurations.
§ Dream Cell Structure
I challenged myself to create a scheme that is essentially the same as Standard, but based on my own perspective and the elements I have included in my NixOS configuration.
In my previous repository, I had separate definitions for nixos and user configurations, which could be installed separately. I wanted to maintain this setup because I am accustomed to it, although I'm not sure if it is the most correct approach.
Next, I wanted to avoid using profiles and suites and instead choose more
descriptive names. I came up with the following hierarchy:
flowchart BT

    applications ---> homeConfigurations
    devices --> machines
    machines --> nixosConfigurations
    system --> installations
    installations --> nixosConfigurations
Let's examine how the home system and work system are arranged.
At home, I run NixOS on my PC, so the system must have properly configured hardware such as a mouse, monitor, disks, printer, etc. Additionally, since I use a pure NixOS bare metal installation, I need to configure the window manager, sound, graphics, etc.
flowchart BT

    devices["
      <b>devices</b>
      disk_ssd_win
      ethernet
      graphics_nvidia_3080
      monitor_acer
      mouse_logitech_g502
      printer_hp_deskjet
    "]:::list

    machines["
      <b>machines</b>
      tower
    "]:::list

    system["
      <b>system</b>
      bootloader
      bluetooth
      networking
      sound
      essentials
      i3
      docker
    "]:::list

    installations["
      <b>installations</b>
      common
      bare_metal
    "]:::list

    nixosConfigurations["
      <b>nixosConfigurations</b>
      home
    "]:::list

    devices --> machines
    machines --> nixosConfigurations
    system --> installations
    installations --> nixosConfigurations

    classDef list text-align:left;
At work, I run NixOS on WSL, so the entire machine part is not necessary because it is managed and configured by the host Windows system. However, the installation on WSL requires its own specific configuration and setup of VNC.
flowchart BT

    system["
      <b>system</b>
      wsl
      essentials
      vnc
      docker
    "]:::list

    installations["
      <b>installations</b>
      common
      wsl
    "]:::list

    nixosConfigurations["
      <b>nixosConfigurations</b>
      work
    "]:::list

    system --> installations
    installations --> nixosConfigurations

    classDef list text-align:left;
This is how it should work in theory, at least. In practice, I was only able to configure WSL for work. At home, I also found a WSL configuration that allows me to avoid annoying reboots whenever I want to switch between gaming and crafting. Of course, it has its limitations, but I believe this is currently the most energy-efficient option for me.
§ Outro
Hive is still in its early stages with only a few people involved, and most of the work is being done by one person. This person may also lose interest over time and shift his focus to other projects.
Additionally, the lack of openness, such as the absence of documentation, may discourage the few interested individuals who come across it. It is possible that Hive could easily fade away in the future.
This is why I have chosen to write this blog post, to uncover what is hidden behind the facade of this "secretly open NixOS-Society" and share this idea with a wider audience.
If you like this post, please leave a comment, even if it's just a simple kudos. You wouldn't believe how great it feels to see that someone has read through the work you spent a long time working on and that it is not completely ignored.
Reddit comments
See on RedditGitHub comments